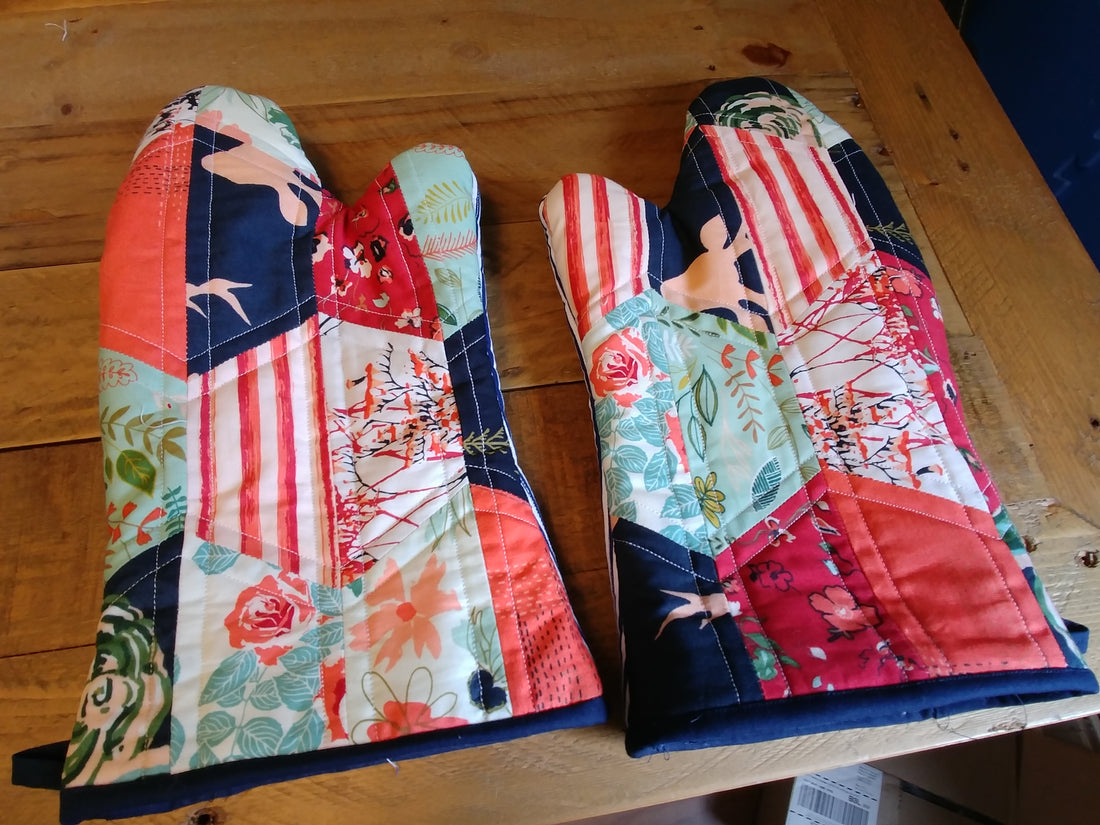
As I work my way through the long list of projects on my to do list, making myself a pair of oven mitts has been on the list for a while. I previously made a little apron with a Woodlands Fusion fabric bundle from Art Gallery Fabrics, and wanted to make oven mitts out of the same fabric so they would match. It was time to knock this project off my list. My current pair of oven mitts are getting old and grungy, and are in need of replacement.
While I knew I wanted to use the Woodland Fusion fabric, I wasn't sure how I wanted the patchwork. I thought about cutting the fabric into diamond pieces. Initially, the patchwork of the oven mitts and apron were going to match. In the end, I chose to do half hexagons instead of diamonds. After cutting 2.5" strips from the fat quarters, I used a hexagon ruler to cut each strip into half hexagons.
I split the half hexagons into two piles, each pile creating a patchwork piece large enough for an oven mitt. These patchwork pieces were going to be the top of the oven mitt. My plan was to choose a coordinating solid or print to make the bottom (palm) of the oven mitt.
I created an oven mitt template using a box from a pair of boots. I traced the oven mitts I currently have in my kitchen onto cardboard. To add a 1/4" seam, I drew a second line on the outside.
I cut out the cardboard template around the dotted line. Using a piece of dress makers chalk to trace my template, I drew the oven mitt shape onto my fabric pieces. I had to do this for eight pieces of fabric, the front and back of each mitt, as well as four pieces of fabric for the lining, two for each mitt.
After cutting out the fabric pieces, I cut four pieces of cotton batting and four pieces of therm fleece. The cotton batting lays between the fabric piece and the foil side of the therm fleece.
I quilted the three layers together before adding the lining. The front patchwork piece was quilted along the half hexagon seams. For the back of the oven mitt, I quilted straight lines 1/2" apart. After quilting the front and back pieces, I cut around the oven mitt to trim the batting and therm fleece.
Once quilted, I sewed the front and back pieces together with a 1/4" seam.
For the lining, I picked out, what I think is fabulous, a printed fabric with white, pink, and navy. I cut four pieces, two pieces for the left hand, and two pieces for the right hand. 
I sewed the lining with a 1/2" seam. I didn't sew the bottom. Leaving the bottom open allowed me to slide the lining over the outer oven mitt piece.
Once the lining piece is sewn together, I turned it right side out. I then tucked the quilted outer piece, which is still turned inside out, into the lining piece. 
I decided to secure the lining to the outside piece by stitching 1/8" along the side, being careful to only sew the seams together.
With the lining and outer piece secured together, I turned the oven mitts right side out, and closed the bottom by adding navy binding.
These oven mitts sound a little crinkly from the therm fleece, but they work great at protecting my hands while taking hot dishes out of the oven. 
Another project checked off my list. Next?

